💥NOT EVERYONE CAN BE CREATIVE💥 || Truth or Myth?

You follow incredible artists, read breathtaking books about far away lands, written by incredible authors. They all create wonderful new worlds and stories that make your heart beat faster and you think: “Wow! I wish I could be this creative!”. But not everyone can be creative…or can they?

Creativity, by definition, is the state or quality of being creative, the ability to transcend traditional ideas and to create something new and imaginative. It is the ability to produce original and unusual ideas.

In today’s world, we are constantly being bombarded by new information, books, tv shows, movies, games and we think: “how can I be creative? Everything has already been thought of before. Not everyone can be creative…not today”

The fact that all of these books movies and tv shows are coming out every single day is proof that anyone can still be creative. In the words of Maya Angelou:

“You can’t use up creativity. The more you use, the more you have.”

– Maya Angelou

“So, if anyone can be creative, why can’t I?” you might think. “What do i have to do to be more creative?”

HOW TO BE MORE CREATIVE

A simple first step is to surround yourself with art, surround yourself with what inspires you, and art doesn’t necessarily need to be painting, it can be photography, books, movies, sculpture, you name it.

A big part of creativity, and something that most people don’t talk about, like it’s a taboo or something, is that creativity is knowing how to hide your sources. You don’t have to steal someone’s idea, but you can interpret it in your own way. Show everyone what it’s like to see life through your eyes. You can gather up a bunch of different ideas that have already been done and just mix them all together in your own way and BAM! you just created something new! You were creative.

Tell me, who are some of the most creative people out there in the world? Children. Why is that?

Children’s minds have no boundaries. They’re not yet equipped with scientifical and social facts that tell them that something isn’t possible, that something doesn’t exist. So everything in their minds is possible and that opens up so many possibilities. If you’ve ever talked to a child, you’ve probably been bombarded by the question “why, why, why?”. Children question everything. They question so much, things we usually take for a fact without a second thought, that our reply usually is “Oh! um I’m not sure. That’s just the way it is!” and only then do we realize that we never actually took the time to think of the reasons behind some of the things that are part of our daily lives.

Questioning things makes you open up your mind to new possibilities and you can make up your own theory.

“Others have seen what is and asked why. I have seen what could be and asked why not.”

– Pablo Picasso

The biggest inspiration we can ever get, comes from our own life. We can take inspiration from the adventures of other people and we can read about how they felt, but we weren’t there, we can imagine how it felt but it will never be the same thing as living it. Obviously we’re not all gonna go on a life or death adventure and we can’t all move to Rivendell, no matter how much we’d love to do it, but we can get ourselves out there! Start a new activity. Take a walk in the woods. Visit a new place. Challenge yourself!

Doing these things will give you life experiences that you can later extrapolate into something different.

For example, imagine you challenge yourself to run a 5k. You go through all the steps. You feel the commitment, you feel the muscle pains, you feel those days when you don’t reallyf eel like doing it but you know you have to and then you feel the victory of when you reach your goal. It feels good! Now turn your 5k into a story.

A story about an elf who needs to deliver this long lost magic book to the most powerful wizard in the realm, but along the way he finds challenges, he gets hurt, he gets discouraged, but he fights on and he reaches his goal. He gets to his destination!

And there you have a creative story from something as simple as a joke.

“To be creative means to be in love with life. You can be creative only if you love life enough to want to enhance its beauty. You want to bring a little more music to it, a little more poetry to it, a little more dance to it.”

– Osho

Don’t be afraid to voice your thoughts. Sometimes we’re trying to be creative and we brainstorm and come up with a ton of ideas that seem great at the time, but then we take a look back at what we wrote down and our brain starts sabotaging. “This is ridiculous! People are gonna think it’s lame. It’s not creative enough”. I know, we’ve all been there, but if you want my advice – run with the idea – develop it, give it a body, give it soul. The most ridiculous things on paper actually end up being the most creative in the end.

Take this idea for example: “A group spends 9 hours returning jewelry”

Sounds absolutely ridiculous! Well, that ridiculous idea just turns out to be one of the most famous and lucrative franchises of all time.

So you finally learned what it takes to be creative!

Now don’t just keep those ideas locked away in your brain or noted down on a piece of paper. Go on and do something with it! Sometimes we just get so caught up with being creative and writing down ideas, that we never take the next step and I know creating something can be scary.

We fear that it’s not going to be good. That we’re not going to be able to pull it off. But the scariest moment is always just before you start. Once you manage to get over that fear, things will flow.

“But I don’t feel inspired right now! I’m just gonna sit there and stare at a blank piece of paper and nothing’s gonna come out well”.

Fear not! Because Stephen King has some more words of wisdom for you:

“Amateurs sit and wait for inspiration, the rest of us just get up and go to work.”

– Stephen King

That’s right! If you just sit there and wait for inspiration to strike you, you’re not going to go very far. You can’t wait for inspiration to find you! You have to go and find her, and you’llsee once you decide to put your hands to work, your brain will start working differently.

You know what helps me to be creative?

When you guys like my posts, share, subscribe to my youtube channel and hit that notification bell to be up to date with all the creative content that I put out every week.

And for more creative tips and tricks I have tons of content available on my Patreon, to help you guys out.

✨𝐇𝐨𝐰 𝐭𝐨 𝐏𝐚𝐢𝐧𝐭 𝐅𝐚𝐧𝐭𝐚𝐬𝐲 𝐀𝐫𝐭✨ – DnD Character Art Made Easy

I work a lot with fantasy art and most of my commissions are for Dnd character art.

I’ve painted a lot of characters, and today I’m going to show you some of the magic behind character art.

For dnd character art specifically, I like to start out with the character’s backstory. So if you’re painting a commission for someone, just ask them for their character story and if you’re painting for yourself come up with your own story.

All of mycharacters have a story. I like to connect with the character, get to know them. Just make them a real person. What’s their personality like? What do they like to wear? All of this will help me clearly picture the character in my mind and will also help me know what their facial expression is like and their body posture as well.

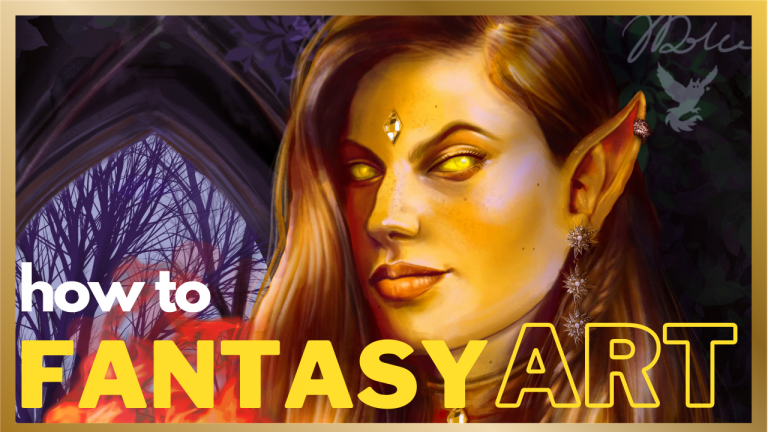
For example, this is Nala. Nala belongs to my fellow artist and youtuber ObscureBeauty art. Nala is an Eladrin elf. Eladrin elves change their physical appearance with the seasons. Nala here is in summer. Eladrin elves in summer turn completely gold and they are more likely to tur nviolent or enraged. Adding to that, she has been exiled from her home, Feyworld, which, as you can imagine, has made her more vengeful. So, we have to make her look intimidating.

Having a description, only makes fantasyart so much easier, rather than just starting out from a visual idea.

Secondly use references. I cannot stress this enough. I have mentioned the importance of using references in my last post, which you can read here.

When it comes to using references, take your time, scroll through pinterest, just get inspired. In this case, I started out with references on how I imagine Eladrin elves look like. Then I scrolled through thousands of pictures until I found the perfect pose for our Elf.

When it comes to portraits, since we’re only working from the chest up, you have to find different ways of making your posture and your character look expressive. For Nala, I looked for references of people with a sort of upturned nose kind of posture, because she does have a superior minded type of attitude. Then play with the original features. Make your character connect with the viewer.

Another great way of adding interest to your dnd character art, is by adding magical props.

A magical prop can be a cool looking cane, or an ancient looking sword, or even a magical amulet around their neck. In this case, since Nala is a warlock, and has a fiery personality, I thought having her conjuring up a fireball would be suitable, and she does look quite pleased with herself.

An important aspect to keep in mind, on how to paint fantasy art, is mood. The mood of a painting is determined by theme, setting and lighting. The theme is an idea behind your painting. Our scene here is pretty much centered around Nala’s confidence and violence, although it is done in a very subtle way. The setting is the place or surrounding around your character. To invoke a dark feeling and imbue the character with darkness I decided to go with a dark background, and although Nala is a dangerous creature, she still likes to be feminine, so I thought it would be a good idea to surround her with plants. Now both the mood and the setting will help us to find the lighting. Most of our light will be coming from our fireball which will be lighting up her face. This will help to stress the theme of Nala’s fiery confidence and violence, and will bring all the attention and focus to her face.

The background will be a lot darker, which brings us to our last aspect to keep in mind, which is contrast.

To make a painting more appealing, it is important to have contrast, and contrast can come in many ways: contrasting shapes: like the contrast between the curling flames and the smooth and straight hair of the character; contrasting colours: like the contrast between the blues and purples of the backgroundand and the reds and yellows of the character; contrasting values: like the contrast between the bright character and the dark background; contrasting ideas: like i mentioned earlier the, contrast between the character’s violent nature and the elegant and fragile nature of plants.

And i could go on and on and on about this subject, but you get the picture.

I promise you, if you follow these guidelines, your painting experience will not only be much easier. but also more enjoyable and your results will speak for themselves.

Want to learn more tips and tricks? Why not help a fellow nerd out and like, share, subscribe to my youtube channel and hit that notification bell so you can be on top of all of the new and juicy contentand?

For even more tips and tricks, I’m on Patreon bringing you tons of content every week

Thank you so much!

𝐃𝐢𝐠𝐢𝐭𝐚𝐥 𝐀𝐫𝐭 𝐁𝐞𝐠𝐢𝐧𝐧𝐞𝐫 𝐌𝐢𝐬𝐭𝐚𝐤𝐞𝐬🤚⛔️ – 6 Tips I Wish Someone Told Me

digital art beginner mistakes

You’re new to digital art, just starting out and have no idea how to go about it? I’m gonna give you Six incredibly useful tips, so you don’t make the same mistakes I did.

I have been doing digital art for about 10 years now and it took me a really long time to feel comfortable painting digitally. When I started out, I didn’t have the amount of information that we have readily available for us at this moment, and so I made a lot of mistakes, and I really want to help and motivate, as many people as possible, to not give up on their art and not to make my mistakes.

MISTAKE 1

Number one mistake that I see beginners do, is not start out with a well-defined sketch. When you’ve been doing digital art for a long time and you know all your basics by heart, you can afford the luxury of having a very loose sketch, or not even having a sketch at all, but as a beginner, you want to have as much help as you possibly can, and so having a very well defined sketch from the beginning is going to help you a lot. I made this mistake a lot. I was either feeling lazy or impatient and I just wanted to skip over the sketch and just go right to the fun part, which is the painting, and it made my life so much harder. Proportions ended up being wrong, one eye ended upbeing higher than the other, wonky hands, screwed up composition, it was a complete mess and it took me so long to just try and fix it and I ended up not being able to fix it all the way through. It’s just not worth it. So at first, take your time with your sketches, make sure that you like the way it is looking before you move on to the next phase.

MISTAKE 2

Second mistake, is not using references. When we’re starting out with digital art, we tend to think that using references is cheating. References are essential for your painting to look good and by references I don’t mean to trace over them or to draw them exactly as they are, but have them off to the side, use them for inspiration, for scenery, poses, mood, lighting, anatomy and use that to make your own composition. Grab a bunch of pictures that inspire you and even take your own pictures if you can’t find exactly what you’re looking for, and build your own world. We each have our very own specific way to look at the world and our entirely unique way to interpret it and so you don’t have to worry too muchabout it. You’ll always end up with a fresh and new sketch.

MISTAKE 3

Mistake number three is rushing your painting. Starting a new painting is always something fun and exciting and so we tend to want to see how our mental image will translate into our final painting. So, we end up rushing. We want to have it finished now and we forget that every painting has to go through its ugly phase. You know that phase, where your painting looks like this abstract image, like it’s just straight out ripped from your nightmares? Yes, we all know that. When we get to that stage, we start to get frustrated, we start thinking, “why does it look like that ? It should look good, but it doesn’t!”. This would happen to me and I would eventually start thinking, “maybe I’m just a bad artist. If iIwere better it look good”. And we start questioning our skills. We start questioning our own worth, when every painting needs to go through this phase, every painting goes through this phase.

Imagine, you have your own lab and you’re building your own human. Bit of a weird comparison, but bear with me. So where do you start out? You start off by building your skeleton, then you add some organs and you put some muscle on top of that. You take a breakand you take a step back and look at what you’ve done. What does it look like? It’s downright scary, you know! It’s not something you want to have just walking around your house. That’s the ugly stage of painting. That’s because you haven’t gotten into detailing yet. You go back to your painting, you add some skin, you add details, eyelashes, nails, maybe a beard, hair, whatever you want to add and then it finally starts looking like your mental image. What you thought it should look like, because you took your time, you didn’t rush it, you added all the detailing, you enjoyed the process. You had fun with it until the end. So never rush your paintings.

MISTAKE 4

Mistake number four is being afraid of making mistakes.

So this is where we get to the weird part. “It doesn’t make sense Joana. You’re making a video about the mistakes beginner digital artists should avoid and one of your tips is NOT be afraid of making mistakes?”

I can guide you and tell you all about my mistakes, but you will eventually end up making your own mistakes and THAT’S OKAY! That’s completely normal and it’s what helps you grow. If you know what will help you be better at digital art, Great!! Use it to make your life easier, but what sometimes still happens to me, is that fear of the blank canvas.

You want to start a new painting, but something inside of you is hesitant. “What if I screw up?” It’s ok. You can paint over your mistakes. With digital art you can undo them and at worst, you can just start over. So dive right in and experiment, have fun.

MISTAKE 5

Mistake number five is not being consistent.

To get better at painting, a lot like anything in life, you need practice, and I know none of us like to hear this at all, because practice takes time. But it’s the only way you’re going to get there. It needs dedication and being open to learn new things. Learning how to be good at anything in life requires a certain dose of obsession. You can’t get the thought out of your mind: “I really really want to be good at this!”. So you take every opportunity you can get to practice it, to improve daily and if you can’t find the time to do it daily, just do it as often as you can. The moreyou do it, the better you’ll get.

And above anything else….

MISTAKE 6

Being bored.

Find a way to love what you do and of never being bored with it. If you’re learning your basics, perspective, anatomy, lighting, but you think: “Joana, watching videos about these subjects is boring. Having to draw the same looking thousands of boxes is boring and ridiculous!”. Well…find a way to make it fun!

I love painting my own ideas, so whenever I’m learning something new, I find a way to incorporate what I am learning into a new painting, even if it’s something really quick. If you’re learning how to draw eyes, for example, and you’re just tired of drawing eyes on their own, why don’t you try to draw a portrait? That way, you’ll be learning your subject and so much more than that, and you’re making it fun for yourself.

The best way to learn is by having fun and enjoying the process, because that way you are learning something new, you’re acquiring new skills without it feeling like a chore.

If you had fun and ended up learning something from this, why not leave a like, share, subscribe to my youtube channel, click that bell so you’ll get notified every time that i post a new video.

You’ll really be helping me out. I am just a small art account just starting out and it’s really hard to grow in the midst of all these huge channels, so any help you could give will be greatly appreciated, and you’ll be getting more videos like this one.

Also, if you’d like to know more digital art tips, I have a patreon in which I share tips and tricks, works in progress, tutorials and I even offer mentoring and one-on-one conversations, in which I help you improve your art. Following me on patreon also makes it possible for me to create more content for you guys.

Thank you so much. I hope you have a lovely day.

Digital Art For Beginners

illustration (4)

Do you ever find yourself on the internet, looking at digital art and thinking:  “oh my god this is so cool, I really wish I knew how to do this, but I don’t even know where to start!”.

Well, I am here to answer your questions today.  

My name is Joana and I am here to help you start your digital art journey. I’ve been getting a lot of  messages lately from people asking me: “Joana, I really want to start painting digitally but I don’t even know where to start. What program  should i use? What tablet should i buy? Am i going  to have to spend a lot of money just to start?“.  

Well, I thought I would make a video explaining  all of those things, going over several painting softwares that I know of and drawing tablets, and giving you some information about them  as well as my own personal opinion.

To  start off, if you want to be able to draw digitally, you’re going to need a tablet.  There are an insane amount of tablets for sale at this moment. When i started out the  choices were very limited to say the least. 

THE TABLET

My first tablet was a Wacom Bamboo. I went on amazon to try to find it to tell you guys the  price and i don’t think they sell it anymore. I bought my Bamboo when i was 14 years old, which is well over 10 years ago, and I used it for a really long time. So if you’re starting out you don’t really need  to invest in something that’s very expensive, something this simple could really help you out when you’re just learning the basics.  

After my bamboo, I upgraded to a Wacom Intuos Pro. This I used for a few years, and I was using it on pc with Photoshop. The tablet connects via usb cable, you have buttons on the tablet that you can configure to use as  shortcuts, for example, to choose a brush, to choose an eraser, to select. You can also  configure your tablet to be used with your right or your left hand. This tablet is a bit more expensive than the Bamboo, and it doesn’t have a display, so you’re going to  have to learn your eye hand coordination because you’ll be drawing on the tablet  and looking at the screen. But that is something that you can get around in in a short amount of time and I know a lot of great artists that to this day haven’t upgraded from an Intuos and do amazing work, so that’s not going to stop you.

Wacom was the initial brand for drawing tablets and, in my opinion it’s still one of the best in terms of price/quality, it still holds up on its own. However, in the meantime, some new brands have entered the market.

We have the Xp-Pen, which is  a much cheaper alternative and you have regular tablets as well as display tablets (those in which draw straight in the tablet without  having to look at your screen).

There’s also Huion, which is being greatly used nowadays by a lot of artists. It’s also cheaper than Wacom, it’s a bit more well known than Xp-Pen and i’ve heard great reviews about it although I’ve never personally used any of these.

I pondered, before getting my Ipad, if I should get an Xp-Pen but I ended up going with the Ipad.  

Then you have the Wacom Cintiq. The Cintiq is sort of the holy grail of Wacom.It’s quite expensive, but it is a very very much quality hardware. I do not own a Cintiq, but i have tried working on one and it’s a very nice equipment.

Then, you have the Ipad, which is actually what I use and what I’ve been using for the past  year, two years maybe This is my most prized posession. I love it and I would never trade it for anything and yeah I can’t live without it. I am a slave to Ipad and Procreate.

Then you’ve got tablets that have their own operating system. These tablets you do not have to have a computer or a mac to work with, you draw directly on them. The Ipad is part of this category. They have their own RAM, they have their own memory and it all stays within that tablet. 

We have examples like the Microsoft Surface, there are some ASUS and as well as HP and they are very good but quite pricey as well.

Then you have the cheaper alternatives, but as expected, they’re not as high quality and you might not get great results with them. You can always draw on your phone by buying a stylus, but I’ve never tried it but i wouldn’t recommend it. It will take you a really long time to get the  same results that you would get with a tablet and you will need a lot of patience. You can also buy a  regular tablet and there’s some free software you can install and using the stylus.

Another thing to keep in  mind when buying a tablet is pressure sensitivity. Without pressure sensitivity your tablet is not  going to do much for you. Pressure sensitivity is what allows you to vary the opacity of your brush in one single stroke as well as thickness of stroke. A tablet without pressure sensitivity is pretty much the same as using your mouse.

SOFTWARE

When  it comes to software, there are an endless amount of programs out there for you to use. Some are free, some are not so free and not so cheap.

There is the basic one, which is the most used in the industry. Photoshop. Everyone knows photoshop. It was the one I used before I switched to Ipad and it is the one that I love the best, because it does have a lot of features that  you can use for your photo and and your drawings. Photoshop, however, does come with a price. There is a monthly fee that you have to pay for it.

Still from Adobe you have Illustrator. Illustrator is another great program that a lot of people use, however Illustrator is more tuned to vector design, rather than painting. So, if you’re starting out with logos or icons or anything vector-based Illustrator is probably your best alternative.

Another program that i’ve heard about is Coreldraw. I did use Coreldraw a few years ago, however I did not use it for drawing at the time, i used it for photo editing, so I cannot attest to the quality when it comes to drawing. However, at that time it was one of the biggest softwares  out there for the design/painting industry. Nowadays, i don’t know how much it holds up to the standards. It is extremely expensive, it is 300 something dollars a year.

Then you  have Clip Studio Paint. Clip Studio Paint is very well known and a lot of people, a lot of very well known artists use it. I have never used it myself so i cannot give you my own personal opinion about it. It is also paid. It goes somewhere between 50 to 215 dollars if i’m not mistaken.

The last program that i’m going to be mentioning that is paid, is of course Procreate. However, I believe that Procreate is incredibly cheap, ten dollars, and you pay it once and you have it for the rest of your life. Procreate is my favorite program to use, however there are some drawbacks. Because it is on the Ipad, there are some restrictions in memory, so you won’t be allowed to have as many layers as you would have on Photoshop, for example. Because of memory restrictions, depending on the size of your canvas, you will have  a limitation to the quantity of layers. It is great for painting. However Photoshop does have more features that you can get, so sometimes I do paint in Procreate and then export the image into Photoshop so I can tune it to my liking.

Now, on to the free software.

The first one I’m going to  mention is Gimp. It’s a very old program, it has been around for a while, however it is not the greatest option out there, and since it’s free, you have many other choices that are also free, so why settle for a lesser program in my opinion.  

Then we have Autodesk Sketchbook. Autodesk Sketchbook is also free, it does have a very  pleasing layout to it, it’s very minimalistic and very easy to navigate. It has some really cool organic brushes, it almost feels like you are painting on your own sketchbook or in a real life physical canvas. If you are having trouble going from traditional to digital this might be a good option for you to start off with, or if you really just like that traditional feeling, this would be a good alternative for you.

The next one i’m going to be talking about is Medibang. Medibang is another program that’s been around for a while, however it is more suited for comics. It is great for creating panels for inking. So I wouldn’t recommend it as much for painting.

And finally, we come to my favorite free software, and that is Krita. Krita is the best free software that i have ever tried. Before I got Photoshop, I did work on Krita for a while. First I started  on Gimp, I upgraded to Clip Studio Paint, Paint Tool SAI and then i discovered Krita, and Krita is pretty much incredible. It is made for painting, it has that going for it that photoshop doesn’t have. The layout is very similar. I think this is the best free program out there, in my personal opinion.

There is also Paint Tool SAI. I used this one for a while as well. It is also a very good option. For me, it’s just below Krita, although it’s not as good as an experience.

Thank you so much for getting this far. I hope that these tips will help you on your journey into  digital art. I hope you have fun drawing and if this helped you please leave a like, share, subscribe to my youtube channel and stay tuned for more videos.

How I Paint the Human Figure

illustration (3)

Hi everyone welcome back!

It’s been a while. I have been quite busy for the last few months, what with a pandemic going on outside and a change of job, starting my own business, it’s been hectic to say the least, but here we are again and today i am bringing you something new.

So to start off the year on a positive and hopeful note, i decided to paint my first series of themed paintings. I am a huge nerd and love to delve into all sorts of topics, and the, let’s say, esoteric, interests me quite a bit. Not that i understand much about it, but that doesn’t stop me.

CAPRICORN

Anyways getting back on topic. I am starting a series of paintings based on the zodiac and since we’re just starting the year, the first painting that i chose to work on was Capricorn.

Capricorn natives are born between the 22nd of December and the 19th of January.Their symbol is the sea goat and some of the traits that symbolize Capricorn are that they are: Pragmatic, Ambitious, Disciplined, Stoic, Independent, Hard-working, Distant, can seem quite emotionless at times and analytical, and like to keep to tradition. In summary, Capricorn is a focused go-getter that doesn’t let anything get between him and his goal.

In the beginning, I was having some trouble getting the face to where i wanted to. I’ve been playing around with different techniques and styles lately, trying to find what fits me best and so this painting in specific took me a bit longer to work on.

THE FACE

When I’m painting the face, i like to think about my own face and how i do my makeup. I find that really helpful. For painting the face, I think about which parts of your own face you would choose to contour, like below the cheeekbones, around the nose, your temples, below your chin and your jawline. So that’s where you will find darker colors.

Where you highlight: the top of your cheekbones, the bridge of your nose, around your cupid’s bow, on your chin, and forehead and the corner below your eyebrows. That would be the lightest color.

Also use a rosy tone for your cheekbones and nose for a flushed look, because those spots are where you normally have more blood circulation.

Then all you have to do is blend and see where your light is coming from which, will affect which parts of your face will be more exposed and the direction of your shadows.

SIGN CHARACTERISTICS AND HOW I REPRESENT THEM THROUGH PAINTING

Now for the portrayal of the sign.

I felt that I had to do some research on how Capricorn is assumed to be like. Taking the traits I mentioned earlier, I knew i wanted a powerful looking pose and a more serious and distant look on her face, showing a powerful independent character.

Since the sea goat is the major symbol for the sign, I also knew that i wanted her to have the typical goat horns and, of course, be a sea creature.

Because she is so independent and a bit distanced from the crowd, I decided to have her be in a secluded cave, surrounded by the ocean.

Now i know that the moon is mostly associated with other signs, but I thought the night suited the character the most and what is night without a beautiful moon?

I researched what colors were mostly associated with Capricorn and I found that grey and brown were the most mentioned, which is a perfect match to the qualities i mentioned. They are very no-nonsense colors.

My starting idea was to join witchcraft with zodiac signs and paint zodiac witches and through my research i appointed Capricorn with the role of green witch, which is a type of witch that takes her powers from nature. That’s why for the most of the painting i surrounded her with greenery, however i felt that it ruined the composition and honestly made it look too crowded, so I gave up on the idea.

I had a great time painting this piece. I feel like i learned a lot from the process and I’m actually quite pleased with how it turned out. It’s exactly like i imagined it. I hope you like it and that i was able to help you in some way.

If you did like it, it would mean the world to me if you liked this post, shared and subscribe to my channel. Feel free to also drop a comment telling me about your experience being or knowing a capricorn, I’d really love to hear your stories.

If you made it this far you’re a champion who deserves all my love, so thank you, thank you so much for reading.

5 Tips for Painting Characters

illustration (2)

Today I’m bringing you five tips on how to paint imaginary characters.

Tip number 1: Have a good description of your character’s physical appearance.

Today I am painting Raistlin from the book series “Dragonlance”. I don’t know much about Raistlin to begin with, and so I had to do a bit of research to know how the author described him in the books. What is his eye color? What color is his skin? What color is his hair? How long is is it? Is his hair long? Is it short?

Tip number 2: Have a good description of a character’s personality

For an appealing character painting, it’s important to see the character’s personality showing through. A character’s personality will deeply affect his face. His personality will dictate his facial expressions and a character that normally smiles a lot for example will have expression wrinkles around the mouth, or a character that is angry a lot will have expression wrinkles between the eyebrows, or a character that just worries a lot will have expression wrinkles on the forehead. That will give a lot more depth to your character and make it look believable.

If you really think about it, your character’s personality will also dictate his posture.

If the character has an imposing presence, he will look taller by having a straighter back and shoulders back. If a character is depressed, the shoulders will be hunched forward and the back would be more curved.

Tip number 3: Have a good grasp on your character’s background story

Just like you and me, a person always has a past that influences how they are later in life, and that is the same with a believable character. What we’re trying to do here, is realistically portray this character and so having a good grasp on his backstory will be very helpful in bringing the character to life.

A character’s background story will influence his personality and his physical appearance as we’ve discussed before.

For example: Imagine that your character was brought up in a frugal home and didn’t have a lot of money. Throughout his life he will have a greater tendency to wear cheaper clothing, maybe have tears in this clothes. If he comes from royalty, he will have a bit of a cleaner look about him, well tailored clothes, maybe a lot more colorful.

Tip number 4: Know the world that this character lives in

Having a good idea of the world the character lives in, will let you know: What kind of dress fits that world, what kind of clothes fit that world, what is his social standing, what does that social standing usually look like in that world, what they usually dress like in that world.

Where does your character live? Does he live in a cave, like me? Or does he live in a palace? What time period is the story set in? That will influence the look of your character as well as what kind of races exists in this world. Is it a normal world like ours? Or is it a fantasy world where you have all sorts of different imaginary fantastical races? Like elves and orcs and fairies and magicians…it’s not a race but let’s go with it. Anything that you might know about this character, this world, will give a lot more depth to your painting.

Tip number 5: Knowing your character’s interests and what is important to them

For making a character painting more detailed and to give it some more history and some more personality, you can have some bits here and there of things that surround this character’s story, things that are important to them.

In this case, Raistlin has a staff with him, which is his magical staff.

You could have a person that is very attached to family, or that had a loved one that passed away and you could give him, for example a locket with that family member’s photograph. You could add that to the picture and add a bit more story to it.

Or imagine that you have a female character that once was proposed to you by someone she loved, but things didn’t work out and maybe she still wears that ring for emotional significance. You could have her wearing that ring.

Just small things that might not seem very important, but actually give a lot more character to your painting.

Bonus Tip:

Taking all of this these steps that I gave, now it’s time to go and search for your reference pictures. It’s good to have several different reference pictures to use. You could, for example, go
on Pinterest or Google and search for a portrait or selfie and select a few pictures of a model or a person that you think fits the description of the character; You can find reference photos
for the clothing and for background.

I hope that this was helpful to you. Please leave a like and share if it was!

Inktober 2019 – Week 1

3

Inktober is upon us once more and this time, I shall be conquering the challenge.

I’ve been participating in inktober for a few years, but always have problems keeping consistency and actually finishing the 31 days. True, it is a demanding challenge. It demands good time management and discipline, two things I’m not very good at. So I’m undertaking this challenge not only as a way to develop a good drawing habit, but also as a way to practice commitment, discipline and consistency.

Before starting the challenge, I figured a great way to make it easier for me to keep motivated during the month of October, was to actually follow a prompt list that truly inspires me, so the last few days of September were used doing research. I found a few Inktober prompts lists, from this year and previous years, and compiled 31 concepts that spoke to me creatively and made my own prompt list.

Day 1 – Bone Mermaid

On the first day I was feeling excited to start drawing. Drawing mermaids is something I’m comfortable with so it was a good way to start off, not jumping straight ou of my comfort zone.

Day 2 – Owl Alchemist

As much as I love owls, this drawing was challenging in itself. I tried to go out of my comfort zone and my drawing style, and I guess we can say it didn’t turn out stellar. It was a learning experience. You live and you learn.

Day 3 – Llama Villain

I love the way this one turned out. Anyone who knows me, is aware that I have somewhat of a llama obssession and pairing that with some wickedness was delightful. But let’s be honest, ain’t nobody got time for dishing out this kind of drawings on the daily, having a limited amount of time to do it. So you won’t be seeing many of these.

Day 4 – Fox Hunter

Since it’s halloween season, when I hear the word hunter, the first thing that comes to mind is “Vampire Hunter”. I started with an idea based on Van Helsing, with a badass hat and all that, but it was looking awful, and as I sketched, it started to look like the fox was wearing a priest outfit. Vampires and Holy Water sounded excellent, so I decided to roll with that. I’m quite happy with the final result.

Day 5 – Raccoon Wizard

This ended up being a quick little sketch (which was not that quick, since I had to do it twice, because the first one looked horrendous). Don’t you just love that little hat? I know I do. He was supposed to have a samurai master kind of mustache, but when I was inking, I forgot about it, so you have been deprived of that precious view.

Day 6 – Deer Knight

Well….drawing a deer face…that was a struggle. The idea was, of a cruel knight that comitted horrible crimes, and as a punishment, a witch cursed him into a beast form. As you can see, he’s not the best looking fella you’re ever gonna see. But, as a friend pointed out to me, if a witch turned me into a beast, I probably wouldn’t have many people swooning over me. He looks butch and not that worried about his looks either way. Embrace your weirdness I say.

Day 7 – Eagle guardian

We have come to the last day of the first week. I finished off on a good note. This is my favorite of the bunch. Probably not that original, but I love the clean look of it. Up until this point I was using Sakura Micron pens and tried out once or twice my Pentel Pocket Brush, but things weren’t turning out exactly like I imagined them. So from this day on I started using Uni Lakubo pen and am so much happier with the results.

My final thoughts on this first week: It was incredibly helpful to understand exactly how long I take to finish this sort of drawings. It helped me create a stricter routine, which I found I was lacking in my life. My days gained a new purpose and I was always excited for the next drawing. It helped me understand what works and doesn’t work for me, material and style-wise and forced me to exercise my creativity daily. Having a look through the drawings, I can also see that the constant practice resulted in better and better drawings day after day as I focused my attention on general form, small details and pen strokes to give interest to the image.

I’m ready to start the next week.

Let’s do it!!!

Bonus Sketch:

Little Mister Frodo Baggins (inspired by my reading of The Lord of the Rings throughout the week)

Thyra

illustration

Should you ever wander to the faraway land, where white blankets dress the earth, and Höðr breathes his chilly breath upon your neck, over frosted mountains and arctic lakes, you might find yourself in the small town of Forsvollr. In this simple, small town, nothing stands out to catch your eye. A dozen plain huts lay in no particular order, each one complemented by its own small pen, residence of sturdy mountain goats and plump chickens. You’d never dream to find something of extraordinary importance to happen in these parts. But something extraordinary did happen. So extraordinary, it would forever change the elven villagers.

Winter was coming once more, and the elves of Forsvollr kept busy, making preparations for the long months ahead. Thyra, as tradition dictated, prepared the basket of offerings for Höðr, the God of Winter, hoping to ensure their safety through the coming harsh months. Her basket was especially bountiful this year for the summer had been kind. Apart from the usual bounty of turnips, beets and cabbage, the harvest had been plentiful enough to also include a display of fat mushrooms, flavourful blackberries and beautiful juicy red apples.

Making sure nothing was amiss with her gifts, Thyra left the comfort of her home and headed for the altar of offerings, hidden deep in the heart of the surrounding woods. She was a tall elf, in comparison to her kin and her long legs aided her in covering the path in a short amount of time. Thyra was the embodiment of the season. Birthed in the dead of winter, features as sharp as the bitter winds and icy complexion complemented by platinum tresses and frosty blue eyes.

“With these gifts I honor you, great Höðr.” – She uttered an old prayer, passed down from her ancestors – “I thank thee for honoring us with yet another fair winter. Teach us, once more, patience and resilience and keep us safe, so we can better serve you.”

(TO BE CONTINUED)